
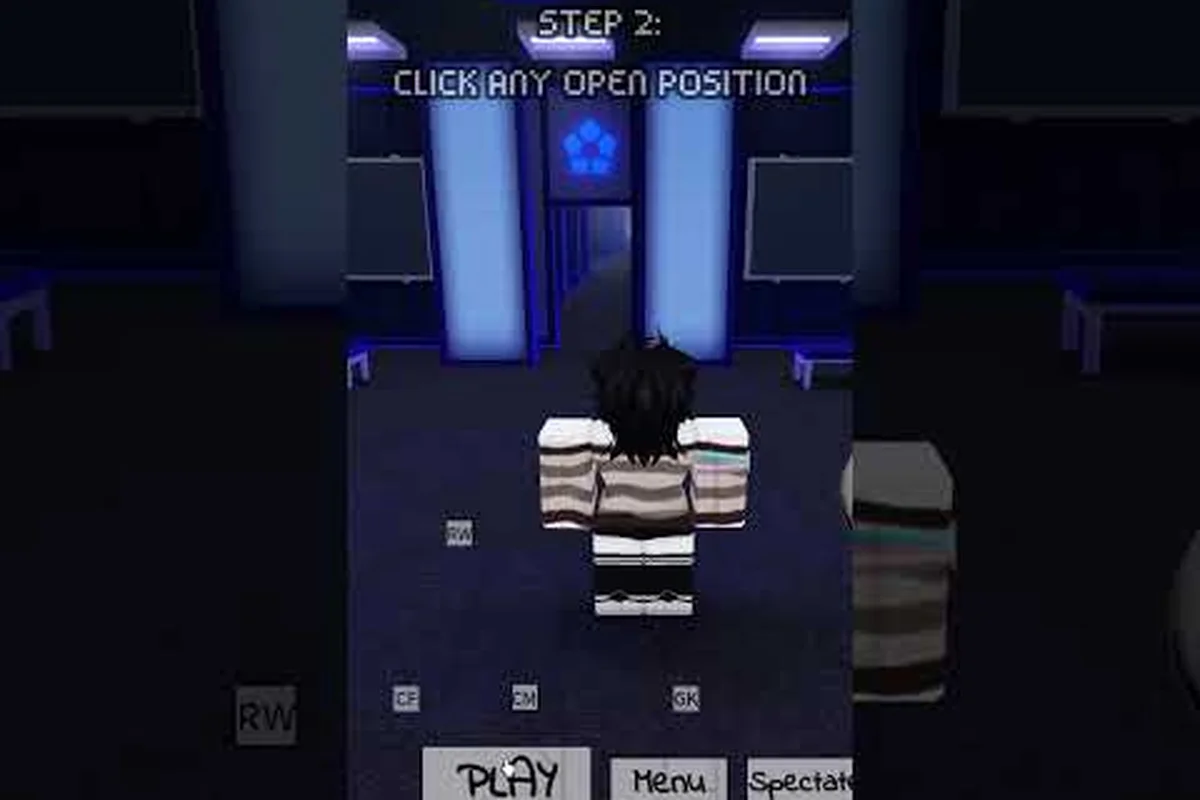
Your very first match in Azure Latch can feel like walking into a stadium tunnel with the lights already on, and this azure latch new player guide is built to make sure you walk out with a goal, not a lesson in embarrassment. Matches run six minutes with ten players per server, and the 30-second intermission is when you lock a position, choose one Style, and decide whether today is a learning day or a winning day. Skip the panic, learn the loop, and the rest of the climb is just repetition.
Reading the Intermission Screen Before It Disappears
The intermission is the only time the game lets you breathe, so treat it like a pre-game huddle rather than a loading screen. You have to pick a position (central forward, left wing, right wing, central midfielder, or goalkeeper) and a Style at the same time, which means the answer to "what to do first" in any match is almost always a decision rather than a reaction. The tip that community guides repeat most often is simple: never enter a match without a position in mind, because picking at the last second wastes the opening possessions.
What Each Position Actually Does
Positioning in Azure Latch is closer to a real football role than a free-for-all MOBA lane, and the five slots each have a clear job. Central forwards stay high, chase through-balls, and convert on breakaways, while left and right wings stretch the pitch, drag defenders wide, and open diagonal passing lanes. Central midfielders act as the engine room, recycling possession and feeding the forwards, and goalkeepers are a dedicated last line with their own dive and distribution tools. Beginners are usually pointed at central midfielder because it touches the ball in every phase and forgives positional mistakes more than the wings do.
| Position | Main Job | Area of the Pitch | Beginner Friendliness |
|---|---|---|---|
| Central Forward | Finish chances, press high | Opponent's half, central | Medium (punishes mistimed runs) |
| Left Wing | Stretch play, cut inside | Left touchline | Low (needs patience) |
| Right Wing | Stretch play, deliver crosses | Right touchline | Low (mirror of left wing) |
| Central Midfielder | Recycle possession, distribute | Centre of the pitch | High (touches the ball most) |
| Goalkeeper | Block shots, claim crosses | Own box | Low (high-stakes role) |
Why the Style Choice Matters More Than You Think
Every Style carries five numbered skills, one T special, and a Flow awakening, and all of them are gated by cooldowns rather than a stamina bar, which means energy management is not about rationing runs but about timing buttons. A common rookie mistake is picking a Style because a thumbnail said it was the best, then never using the T special or Flow because they don't know what the buttons do. The habit that fixes this is picking one Style, reading every tooltip, and only queuing Ranked once you can list the cooldowns from memory.
Building Your First Game Day Routine
A reliable pre-match routine removes the "freeze up" moment that costs beginners goals early in a match. A simple order of operations takes about 90 seconds and runs like this: pick position, lock Style, glance at what your teammates picked, then decide the first action you'll take on kickoff. Players who skip the scan step tend to chase the ball for the first stretch of the match and end up out of position when the first turnover happens.
A 90-Second Pre-Match Checklist
-
Position lock (5 sec) — Commit to a role before reading tooltips so you don't tunnel on one option.
-
Style lock (15 sec) — Choose a Style you have already used in a public server; save brand-new Styles for practice matches, not Ranked.
-
Lobby scan (10 sec) — See which positions and Styles your teammates took, so you can fill the gap rather than stacking the same job twice.
-
Kickoff plan (10 sec) — Pick a first action: hold shape, press the central midfielder, or sprint to the wing.
-
Cooldown warmup (50 sec) — Confirm your keybinds before kickoff, because a mismatched bind costs a whole possession.
What the First 30 Seconds of a Match Should Look Like
The opening possession is where most beginners lose the game before they understand why. A sensible default for new players is to hold your shape early, make sure you touch the ball before you try anything ambitious, and never commit to a run unless you are sure of the passing lane. Even an aggressive Style works better when it is paired with a patient opening, because the goal is to learn the cooldown rhythm of the position rather than to score in the first minute. Your "first game" is more valuable as a learning session than a highlight reel, and treating it that way is what separates a one-time beginner from someone on the noob to pro path.
The Core Skills Loop: Numbers, Cooldowns, and Flow
Once the whistle blows, the entire game compresses into a single repeating loop: read the ball, move into space, use a numbered skill or the T special, then either recover position or commit to a Flow awakening. Every Style has its own version of that loop, but the shape is the same across the roster: a couple of short-cooldown skills to build pressure, a long-cooldown finisher, and a meter that charges as you do the work. The players who improve fastest are the ones who learn to track their cooldowns deliberately rather than trusting their reflexes.
Decoding a Style Card
| Element | What It Is | How to Use It as a Beginner |
|---|---|---|
| Numbered Skills (1-5) | Core actions with cooldowns | Cycle through them in order during your first matches to feel the rhythm |
| T Special | High-impact ability, longer cooldown | Save for counterattacks or clear shots, never use as an opener |
| Flow Awakening | Ultimate-tier move, triggered with G once the meter is full | Use it when defenders are committed, otherwise it is wasted |
| Flow Meter | Shared attack and defence resource | Charges from goals (15%), tackles (12%), dribbles (10%) and saves or headers (2%) |
The Two Mistakes Almost Every Beginner Makes
The first universal mistake is button-mashing during defensive transitions, which burns every cooldown and leaves the team exposed while your kit recovers. The second is hoarding the T special for a "perfect moment" that never comes. The fix for both is the same: aim to use your T special a couple of times per match even if the shot is not ideal, because building the muscle memory matters more than waiting for a highlight. Players who internalize both lessons improve noticeably within a week.
Climbing Out of Beginner Ranks Without Burning Out
Azure Latch rewards consistency more than flashy individual matches, and improving from your first match is mostly a matter of running the same routine enough times for it to become automatic. Most beginners stall because they switch Styles every match trying to find a "main" instead of learning the one they already have. Pick a Style, play a batch of matches with it, then evaluate. That single habit is the difference between a player who plateaus immediately and a player who keeps improving.
Weekly Practice Plan That Actually Works
| Day | Focus | Match Count | Goal |
|---|---|---|---|
| 1 | Style exploration in public servers | A few | Try a new Style to confirm your main |
| 2 | Position discipline | A few | Play only one position, watch your positioning |
| 3 | T special timing | A few | Force yourself to use T twice per match |
| 4 | Flow awakening setup | A few | Practice the buildup, not the payoff |
| 5 | Ranked with your main Style | A longer block | Apply everything, ignore win/loss |
| 6 | Review replays | 0 | Watch two losses and write one note per match |
| 7 | Rest | 0 | Cooldown off the controller |
When to Switch Styles (and When Not To)
The short version is that you should only switch Styles after you have given your current pick a real run — several full sessions, not one bad night. If you are trying to improve, switching Styles resets that progress, and you end up mediocre at two Styles instead of competent at one. The exception is if your current Style genuinely does not fit the position you enjoy, in which case the switch is a position fix rather than a Style fix. For a deeper breakdown of the roster by published rarity, the style tier overview is worth bookmarking before you commit to a long-term main.
Smart Progression: Mastery, Cash, and the Long Game
The "noob to pro" climb is not only about matches, because Azure Latch layers a mastery system and a soft economy on top of the on-pitch action. New players who ignore the mastery questline end up missing free Style unlocks, while players who ignore the cash economy end up locked out of the Style coin rolls that make the next competitive push possible. The good news is that both systems are designed to reward people who simply keep playing, so the same routine that sharpens your play also fills out your roster.
Daily and Weekly Habits That Compound
-
Push the mastery questline a little every day — Mastery is a set of multi-stage questlines that permanently unlock evolved Styles, so steady progress adds up over a week, and the mastery quest walkthrough maps the fastest path through the early stages.
-
Spend a little time on the cash grind — a win pays 100 Cash, a goal 50, an assist 30, a steal 20 and an ankle break 20, so simply playing pays you; the full breakdown lives in the cash farming guide.
-
Convert spare Cash at the 5:1 desk — Cash turns into Style Coins at a fixed 5:1 rate, so banked Cash is never wasted, and the economy breakdown shows where each coin comes from.
-
Review one loss per session — pick the moment you got scored on and write down what you could have done differently, because the act of writing forces a clearer mental model than just replaying the clip.
Reading the Ladder Without Tilt
A common beginner trap is treating your progress as a verdict rather than a measurement, and the players who improve fastest treat each session as information instead of a report card. The difficulty of the opponents you meet rises as your own play improves, and the right response to a losing streak is to slow down and tighten the routine, not to grind harder. Ranked itself unlocks at 500 goals or 250 saves, so there is plenty of time to build those habits first; the community's competitive notes cover the teamplay and tempo changes that matter once opponents start closing passing lanes.
Frequently Asked Questions
What should I do in my very first Azure Latch match?
Pick central midfielder and a Style you have used before, hold your shape early, and aim to touch the ball before you try anything ambitious. The goal of a first game is to learn the cooldown rhythm, not to win, so treat every touch as information. Players who follow this approach settle into the game much faster than those who chase the ball from the first whistle.
Which Style is best for a brand-new player?
There is no single best Style because it depends on your position, but the two Common Styles — Isagi Yoichi and Gagamaru Gin — are the cheapest to roll and the most forgiving to learn on, while quest Styles such as Yo Hiori and NEL Isagi Yoichi are earned rather than pulled. Pick whichever fits the position you enjoy, then commit to it for a solid block of matches. Switching Styles too early is the most common reason beginners stall.
How do I get better at Azure Latch without burning out?
Follow a weekly plan that mixes public-server practice, Ranked, and replay review rather than queuing Ranked every session. The routine outlined above is enough to improve steadily without tilting. Burnout almost always traces back to playing Ranked when tired, so cap those sessions and stop while you still have something left.
Is the controller version of Azure Latch harder than keyboard?
The mechanics are identical, but the timing windows can feel tighter on a controller because an analog stick does not snap to a direction the way a keyboard does. Azure Latch supports custom keybinds, so it is worth rebinding your speed burst and T special to buttons your thumbs can reach without leaving the face buttons. With a comfortable binding set, controller play is fully competitive with mouse and keyboard.
When should I start caring about Style rarity and cosmetics?
Rarity describes how hard a Style is to roll, not how strong it is, so raw skill beats a rare pull for a long time. Cosmetics — emotes, titles, MVP animations and goal effects — are the main thing Cash buys and have no effect on play, so treat Style Coins as the currency that matters if you want more Styles to choose from. Revisit rarity once you have a stable main and a clear sense of your preferred position.